Wednesday, October 31, 2007

Kitchen Remodel: REJECTED!

Yesterday was our final electrical inspection. It all went fine until just about the very end.

Rejected!

What?

How?

Apparently, on the peninsula between our kitchen and dining room we need an additional electrical outlet because the top of the cabinet facing into the dining room is 6" higher than the kitchen coungtertop which backs into it. That's right, since it is 6" taller it is being considered a "wall" so it needs to have an outlet ever so many feet. (see diagram below). Although the electrician put in an outlet on the side the cabinet (at the very end of the peninsula) that wasn't enough to satisfy the inspection.

So today the electrician came back today to put in an outlet. I had to be installed into the back of the cabinet facing into the dining room....so the outlet front faces into the kitchen. That meant the electrician had to cut a hole in the new dining room cabinet (which have glass doors...ick...get the idea?) to house the outlet. Fortunately it's not that visible, but it sure is a sad thing to see the cabinet marred with this.

To top it off, the inspector asked to see our breaker/fuse box. Noticing that there is no fuse box but a nice new circuit breaker box, he immediately asked when it got replaced (our house was built in 1959/60). Paul replied about 5 years ago by electrician so and so. The inspector said he'd check the inspection on record back at the office. Good thing Paul kept the inspection card from our basement remodel (when we replaced the box).


The rejected inspection card...
...rejection is so hard to take...


The purple outlines the edges of the Silestone countertop...
...which sits mostly on the dining room cabinet...
...that is about 6" higher than the kitchen countertop next to it...
A-a wall outlet facing into the kitchen from the wall (already there)
B-a wall outlet facing out from the end of the kitchen cabinet (already there)
C-where the inspector is making us put the additional outlet


A shot taken from laying on the floor...yuck!!
As Count Floyd might say, "Vow, kids...vasn’t it SCARY vhen we had to put in that outlet?"
We'll paint it white to match...hopefully it will hide it somewhat...
...and hopefully no visitors will lay on the floor next to it and look up...


The view from a seated position...
...fortunately you only see a small piece of the flexible conduit..
...which we'll paint and put something artfully in front of...
...note the child locks...Sammy can be a handful!

Wednesday, October 24, 2007

Kitchen Remodel: Cool, clear water!

Much progress is being made in our kitchen remodel this week. Monday's highlight was to have the plumber hook up the water in the kitchen (the sink faucet, garbage disposal, dishwasher, and refrigerator water line).


Since work started on our kitchen before Labor Day, this is a huge event for us. We turned on the sink faucet and gazed in contentment at the water coming out for a very long time.


The plumber showed up early on Monday...


Our much beloved Kohler Essex faucet (in "Vibrant Brushed Nickel") ...
...with water finally pouring out...

Friday, October 19, 2007

Kitchen Remodel: Corian Countertop Installation

This last week the much awaited Corian counter top got installed. Earlier they had come out and done some digital photographs using tape with patterns of dots on it to make the template. The counter top came in three pieces and first perfectly. All they had to do was lay it down and attach the pieces.

Paul asked the installers how much Corian counter tops they are installing these days. The guy said something like this is the third they've done in six months. Apparently everybody wants either Granite or one of those stone dust (Silestone, Cambria, etc) counter tops these days. We like the feel of the Corian and the look of the integrated seamless sink. And Corian is priced somewhere between Formica and granite. The main thing is that you can't put anything hot directly on the Corian counter top.

We're still waiting on the Silestone top for the cabinet which faces into the dining room--it is supposed to get installed next week.

The Corian counter top arrives...


Two of the three pieces have been laid down at this point...
...can you spot the seamless Corian sink?


This gizmo pulled the two slabs together so the adhesive could set...
...it looks like something from an old 1950's Sci-Fi movie ...


This is the "user manual" they gave us...

Thursday, October 18, 2007

Kitchen Remodel: Cabinet Installation Part III

Well, the cabinets are all in now. The installers returned with the doors to the white cabinets facing into our dining room. The top of the cabinets will get a Silestone top in Verde Agua (to add some color to the mix). The cabinets are painted a bright white to match our woodwork in the dining room.


We have to get kidde-locks for these...

Wednesday, October 10, 2007

Kitchen Remodel: New Refrigerator Arrives

Now that the electrical is mostly done, we had the refrigerator delivered (the local store was kind enough to hold it in their warehouse for a month or so). It was a bit pricey to get a cabinet-depth refrigerator (to replace a perfectly good one) just to have a clean line of wall cabinets, but we think it was worth it--the wall on the side only barely comes out past the face of the cabinets and the old fridge it would have stuck out an additional 6 inches.

Little Sammy got a kick out of the appliance cardboard box he gets to play with now.


The fridge arrives...


The electricians previously installed the wall oven...
...here is one wall that is pretty much complete now...

Sunday, October 7, 2007

Kitchen Remodel: Counter Template

This past Wednesday the Corian guy came to make the counter template so they could accurately fabricate our counter top. He put tape with patterns of dots on the wall and edges of the cabinets. Then he laid down some tiles on the top with more dots on them. Finally he took digital pictures from various angles. He said that he puts the photographs into some sort of software which then can calculate the counter top dimensions (based on how he joins up the dots in the photographs). In about two weeks we should have our counter tops installed!


Polka-dot tape and polka-dot panels...

What one of the polka-dot tiles looked like...

Kitchen Remodel: You Light Up My Life...

Yesterday (a Saturday) the electricians showed up to finish most of the electrical work. The put in the furnishings on the recessed lights, installed the wall oven, put in the outlets, and the under-cabinet lights. We went with the Kichler Series II Xenon under-cabinet lights. The electricians are a father and son operation, both very friendly, did excellent work, and we'd highly recommend them.

What was once lighted by a single 100 watt light bulb is now this...
...a "pot light"ed room that Candice Olson would (hopefully) approve of...

Autumn Descends...

Autumn descends on our neighborhood. Surprisingly, there is a stretch of road a few blocks from our house which looks like a country road...


Earlier today...

Tuesday, October 2, 2007

In the Middle of Our Street...

Here are some snapshots I took with my Sony DCS-T1 camera in front of our house back in 2005. Our street is a residential boulevard. For about 2 weeks during spring (2nd half of May usually) the trees bloom. It never lasts as long was we would like it to, so the rest of the year, we just have photos. When we bought our house, they were in full bloom. Someday, when we put our house on the market (years from now), we will do so in the 2nd half of May.


Nothing Says I Love you...

Nothing says I love you, like a new chandelier....or...diamonds are forever but a chandelier lasts long enough. Since we've now opened the wall up between the kitchen and dining room, Michele wanted a new chandelier to echo our choices in the kitchen. Since it will soon be the 25th anniversary of our first date (high school sweethearts) we decided celebrate by geting her choice. Once we get it installed we'll post a photo.


Here's a pic of our current chandelier...
...in the house when we first moved in...
...we tore off the wallpaper soon after we moved in...
...oh, and the wall to the where the kitchen on the left has now been opened up...

Monday, October 1, 2007

Kitchen Remodel: Cabinet Installation Part II

The second day of kitchen cabinet installation went well. For the most part the cabinets are installed (the have to return one more time for some minor finish details). The installers really had to work on a couple of spots to get the cabinets to look right (as it would seem, most houses do not have perfectly square and straight walls). Here's some photos of the kitchen now. Note the crown molding is installed too.


From the living room looking into the kitchen...


From the dining room looking into the kitchen...


From the dining room, again looking into the kitchen...


Veto inspects the new recycle center...

Friday, September 28, 2007

Kitchen Remodel: Cabinet Installation Part I

Today the long awaited event began -- the installation of our red oak quarter-sawn Shaker style kitchen cabinets. Paul put on a quick coat of Sherwin Williams Porcelain (SW 0053) before they came (they arrived at 7:30am). We were really impressed with the two installers, really nice guys who seemed to know what they are doing. They didn't finish today, so they will be back at 7:30 come this Monday morning. The Corian guy who will make the counter top template can't come until Wednesday. But so it goes...progress!


The cabinet maker's installers arrive!


Work begins!


Piecing it all together...


Our 17lb cat Veto inspects the work...
...from where he shouldn't be...
...where the counter top will be!


The refrigerator will go in the middle...
...we feel that we made the right decision to buy a cabinet depth refrigerator...
...so all the cabinets on this wall will be the same depth...


Another view of the cabinets on this wall...

Thursday, September 27, 2007

Kitchen Remodel: Floor tile is now in....

Today the tile man put in the floor tile grout. Tomorrow they start installing the cabinets. Monday the Corian guy comes to make a template for the counter top fabrication. We're getting there...slowly...but we're getting there.


The tiled floor...

Tuesday, September 25, 2007

Kitchen Remodel: Tile Progress

The tile man continues his progress. The floor has now been leveled and he is laying tiles...


You can see the portion of "cement" he last put down in the lower left hand corner...


Tiling commences (note we started painting the walls)...


The tile guy is kind of neat, he seems to take his time to be accurate...
...which we like...

Saturday, September 22, 2007

KAVOOOOOooooooooosssshhhh!

This blog entry was originally posted to our main blog on August 23, 2006. Since the bathroom goes into the same floor as the kitchen, we briefly considered re-tiling it all to match the kitchen during our ongoing remodel. But after some reflection we thought, the tile we have now is fine, the money would be better spent elsewhere. Anyway, our posting from last year continues below...


This is what our bathroom looked like 9 years ago...
...excluding the wall paper, it is pretty much the same...


..............................................................

I
nspired by Paul's sister Anne who replaced her bathroom fixtures recently, we decided to start doing the same. So first to go was the toilet downstairs. It was a Crane with very poor flushing power...probably dates from the early days of reduced volume flushers which weren't engineered so well.

We chose to go with a Kohler Cimarron Comfort Height toilet. "Designed to have the sitting height of a standard chair....[it] features Class Five flushing technology that delivers extraordinary bulk flushing power." Because our downstairs bathroom is small (we live in a very small house), we went with the rounded front.

Kohler is an interesting company. Located in (where else) Kohler Wisconsin, it is a family owned business with revenues approaching $3 billion. If you ever have the chance to visit there (as we did) take the Kohler factory tour. It is intense...almost 3 hours...you get to see just about everything they do there (such as making sand cast metal objects). It is the best factory tour we have ever been on. They take you right onto the factory floors!

Well, in any case, our downstairs bathroom should now be ready (with the Class Five flushing technology) to accommodate the flushing needs of our guests!


We always call Joe to do our plumbing...


Our old toilet...


For our new toilet, we chose the Bold Look of Kohler...


Our new toilet....sans the tank...


Our new toilet in its new location...

Kitchen Remodel: How To Cope

We're a few weeks now into our kitchen remodel. So our current "kitchen" consists of a utility tub we had installed in our basement and a 20+ year old Kenmore microwave Paul bought back in college. Surprisingly, we get by pretty well...eating a lot of hot dogs, microwavable mac-and-cheese, and Pizza Hut.

When we were emptying out our old cabinets before the tear out, we found that Paul has more than a few bottles of Yukon Jack in there. It would be interesting to figure out how we ended up with so many bottles of it. Maybe we should just say we use the Yukon Jack as paint thinner.


All the bottles we found in the kitchen cabinets...

Kitchen Remodel: The Final Plan

Next week the cabinet maker installs the cabinets. Here is the final layout plan. Note that on the upper right hand corner, we had to see what ducts went through the wall...it affected how large the opening was. We did relocate one duct. Also note that on the bottom, where the refrigerator goes the cabinets are all now counter depth. It was a bit pricey to buy a counter depth refrigerator just to accomplish it, but we think it will look better in such a small kitchen.


The final plan....

Friday, September 21, 2007

Kitchen Remodel: The Tileman Cometh

The the drywall guy finished two days ago (Paul still needs to prime and paint the walls). Yesterday the tileman came, put in screws to remove floorboard squeaks, laid a steel mesh, and today started leveling the floor. If you look at the picture below, he's putting on a about 1/2 inch to level off all irregularities in our floor (he's almost finished). After the tileman is finished the cabinets get installed. Woo-hoo!

Imagine tile, cabinets, countertops, etc here...

Thursday, September 20, 2007

Faith in Numbers...

One of our favorite TV shows is one called "Connections." Wikipedia describes it as taking "an interdisciplinary approach to the history of science and invention and demonstrates how various discoveries, scientific achievements, and historical world events built off one another in an interconnected way to bring about particular aspects of modern technology." Our favorite episode is "Faith in Numbers" (we highly recommend watching how the Jacquard loom was a contributor to Herman Hollerith's tabulating machine).

By no means are we inventors of any type, but we are always amazed at the increasingly small interconnected world we live in (think of the Six Degrees of Kevin Bacon...or what is really called the "Small world experiment").

Since we are always in the process of renovations of our house, we pay attention to things such as the real estate bubble. Similar to the dot-com bubble, you knew the downside was coming, you just hoped it never would. There always is the risk of putting too much money into our house. So as we engage in our ongoing kitchen remodel, Paul pours over the daily reports of real estate prices coming back down to earth. We have no immediate plans to sell or move, but Paul likes to keep an eye on things. This past week he came across a Wall Street Journal front page article, "Size of New Homes Starts Shrinking As Builders Battle Housing Slump" (Evans, Kelly, WSJ, Sept. 12, 2007). The following portions of the article caught his attention:
More recently, turmoil in the mortgage market has made it harder for buyers to qualify for bigger loans... this is causing builders to redraw their blueprints. After reducing prices on their current inventories of unsold homes, the next step is to "start building to a new market. That new market is a lower price point at a smaller size"... Some welcome the downsizing trend, including author Sarah Susanka. Since 1997 Ms. Susanka has written several best-selling books extolling the virtues of "The Not-So-Big House," and she says she has recently been attracting more interest from home builders. "I used to be asked all the time why would anybody want to downsize? People thought I was crazy," she said. "Now it's becoming much more mainstream."
A day later, Paul was perusing through the March 2007 issue of "This Old House" which had a list of "10 must-own tomes for any serious homeowner." On it he noticed #3 and promptly ordered it from Amazon.com:
  1. Renovating Old Houses by George Nash (Taunton)
  2. The New Color Book, (Chronical Books)
  3. The Not So Big House, by Sarah Susanka (Taunton)
  4. Period Details, by Martin and Judith Miller (Crown)
  5. House, by Tracy Kidder (Mariner Books)
  6. A Field Guide to American Houses, by Virginia and Lee McAlester (Knopf)
  7. Home Improvement 1-2-3, (Meredith Books) Note: we already own this one.
  8. Haley's Hints, by Graham and Rosemary Haley, (New American Library)
  9. Interiors by Design, by Ros Byam Shaw (Ryland, Peters, and Small)
  10. New Illustrated Guide to Gardening, (Readers Digest) Note: we already own this one.

Days passed and the book arrived. We browsed through it and were impressed with the author's focus on quality over quantity. Later, Paul was reading the acknowledgments to "The Not So Big House" and was struck by the following:

First, I wish to acknowledge the debt I owe to Christopher Alexander and his colleagues at the University of California, Berkeley. Their remarkable book, "A Pattern Language," published in 1977, struck me early in my education as the most appropriate way to think about architectural design, buildings, and the people who inhabit them. It is largely as a result of their work, which has provided inspiration for a generation of architects , that I came to write this book.
It was like a lightning bolt hit him as he remembered a bit of trivia. He dusted off a software development book called "Design Patterns: Elements of Reusable Object-Oriented Software" which had had a substantive effect on software development ever since it was published back in 1994. In the introduction it reads:
Christopher Alexander says, "Each pattern describes a problem which occurs over and over again in our environment, and then describes the core of the solution to that problem, in such a way that you can use this solution a million times over, whithout ever doing it the same way twice." Even though Alexander was talking about patterns in buildings and towns, what he says is true about object-oriented design patterns. Our solutions are expressed in terms of objects and interfaces instead of walls and doors, but at the core of both kinds of patterns is a solution to a problem in a context.
It was fun to see how a core piece of Paul's daily work actually was linked into one of our favorite pastimes...houses/architecture...and in particular a book that might give us some ideas for our modest (translate: small) home. So of course, we had to order Alexander's book (not in yet).

So in this sequence of related pieces, what might we link to next? Try Uraguay.

You see, a close friend of Michele's -- Johanna -- is from Uraguay. She came to the states as an exchange student and stayed with a local physician's family here in Rochester. After she graduated, she stayed in Rochester and remained close to here "adopted" family. Not to long ago, our Uraguyan(?) friend had a milepost birthday, which was celebrated at her "American family's" house (built near the Zumbro River in Rochester). So we had the opportunity to see their lovely house up close. While quite larger than our house, it does not seem like a big house. The rooms are cozy and functional.

You can imagine our surprise last night when one of us was reading the September 14, 2007 edition of the local newspaper's "Real Estate Marketplace" and saw on page 3 an article profiling the physician's house. On the fourth paragraph...
Susanka designed a Rochester House overlooking downtown on the Zumbro River for [the owners]...who rave about the finished product. Incorporating people's lifestyles into their house is an important Susanka missive, because it results in a house that is well used.
So there you have it...an interconnected world. Our work interests are linked to our recreational interests. And through our friend we had the opportunity to see the author/architect's work up close instead of through just a handful of photographs.


..................


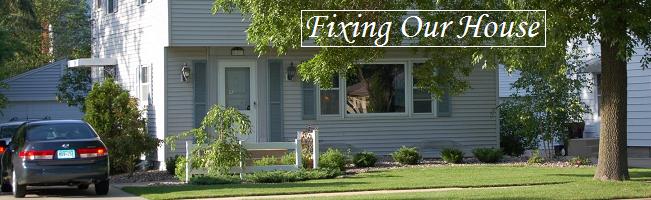
When we purchased our home in Rochester, Michele insisted on buying a home that had "character" as opposed to much of the cookie-cutter split levels so common in this area. Paul's desire for the ability to live off one income (if we needed to) limited us on how much we could spend. As a result, we bought a house built in 1960. It would have been nice to buy a much older home, but then the cost of maintaining it would probably have been higher.

But it is kind of cool to see that we avoided (based on our constraints) what Susanka describes:
When most people contemplate building a new house or remodeling an existing one, they tend to spend time focusing on floorplan options and square footage. But in a completed home, these are only a very small portion of what makes an impression. What also defines the character of a house are the details, such as a beautiful stair railing, well-crafted moldings around windows and doors, and useful, finely tailored built-ins. These details are what attract us to older homes. New homes should be no different. However, such details cost money. And unless people are working with an architect, it is unusual to spend such time thinking about the aspects of the design. Because most people start with a desire for more space than their budgets allow, anything more than basic space, minimally detailed, will exceed the budget.

The Not So Big House book...
...on the floor of our not so big home...

Friday, September 14, 2007

Sometimes it pays to be paranoid...

Recently Southeast Minnesota received a lot of rain. A lot. In about 24 hours our part of town received 11.5"...no kidding. We noticed that some home owners down the street put sheets of plywood over their basement egress window openings.

How did our basement fare with the two sizable basement egress windows in the front?

In our original posting on our basement remodel, we didn't mention everything that happened during construction. So now for the rest of the story...

Paul is a bit of a worrier. Or you could say he has a heightened sense of concern. One night during the construction he had a dream that his neighbors burned him in effigy (really) over poor construction of the egress windows (in the dream). When he woke up, he began to think about water displacement...

To illustrate his thoughts, look at the following pictures and captions...


An exterior view of a Bilco ScapeWEL...
...note that the rain would just pour in...

There is an optional Bilco clear cover...
...which we chose...
...but note that any water displaced will drop immediately over the sides...
...so is that still a problem?...yes...


Because when installing the ScapeWEL...
...you have to dig a large(r) opening...
...as with putting in any egress...
...but...
...Bilco has some very specific instructions regarding backfill...


From the ScapeWEL installation manual:


STEP 6 Backfilling:
If sandy soil exists, line the opening with a permanent barrier (such as house wrap) to restrict sand from washing into rock. FAILURE TO PROPERLY BACKFILL WILL VOID WARRANTY

OUTSIDE of Well: Backfill evenly by hand on all sides as the hole is filled in; Do not do one side at a time. Always use 3/4” clean free-draining rock or A6 stone completely around the well at least 12” in width to isolate the well from the earth. Fill area to within 4” of top step panel. This will keep window well movement to a minimum during cold weather freeze/thaw conditions and settling soil. Do not use expansive soils, frozen soils, material that has debris, or organic material.

What this all meant was that any water displaced over the Bilco covers we bought would just drop over the side onto the gravel and again go right into the bottom of the egress opening. If we were ever to get 6" or more of rain in a short period of time, that could cause an accumulation in our window well. Our 1960 house does not have exterior drain tile. So what to do?

Paul went to the general contractor and told him about his dream and that we had to change our design...to use stainless steel corrugated window wells (since you don't have to backfill them with gravel...and thus the displaced water would not be a problem). We would eat the cost of the already purchased Bilco materials to prevent a future catastrophe. The general contractor took it in stride (and ignored the opportunity to play Sigmund Freud to Paul's dreams). He said let's first look at all the options. So we took to thinking and came up with a plan.

What we ended up doing is laying 6" under the ground rubber roofing material (for flat roofs) over the ground at a slope away from the house. The roofing material was cut around the Bilco ScapeWELs so that any water displaced over the sides would hit the ground (6") of it, saturate it quite quickly and cause any more to wash off the ground (at a slope) away from the house. Further more, we also lined the vertical sides of between the backfill and the earth to prevent water from seeping in along the sides.

Until this year we had no problems.

When the 11.5" of rain came this year...we still had no problems.

Sometimes it pays to be paranoid.